
enthusiastic about enfuse
I've dabbled with HDR photography a bit in the past, but always felt the results were quite cartoonish. The saturation is often off the charts and the local contrast added by most tone mapping algorithms typically seems very heavy handed, for what I want to achieve. While that is a perfectly valid thing to do, it just doesn't appeal to me that much. I have managed to do some more realistic HDR images, using the Wukong beta/ Essential HDR product from Imaging Luminary but since I moved to a Mac, I haven't been able to use their software. I started looking for something similar for OS X and got a recommendation for Enfuse. This is an open-source solution to the problem, that takes quite a different approach to blending the exposures.
Instead of generating a merged, high dynamic range image with floating point pixel values, the enfuse algorithm picks out from across the various exposures what it considers to be the best exposed pixels for a particular region, then merges them all together. There is some level of control for the user; to provide masks, or bias it towards keeping contrast or saturation in the image. The algorithm can also automatically align images, if you haven't shot them all on a tripod. I've found that the defaults work well to merge a well exposed set of images. The resulting merged image is then a great starting point for further adjustments.
While Enfuse is open source and available for free, I've been using an Adobe Lightroom plugin that is sold as donationware, by Timothy Armes. The LR/Enfuse plugin simplifies running the merge from Lightroom. I just have to select the various exposures and run the plugin to get a merged result back in Lightroom, ready for further adjustment.
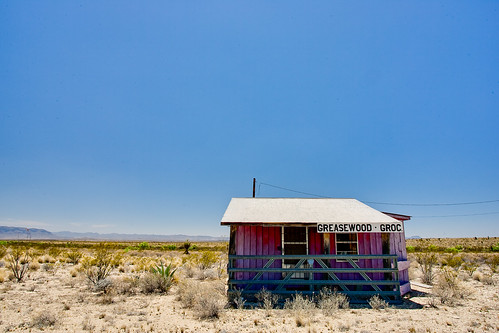

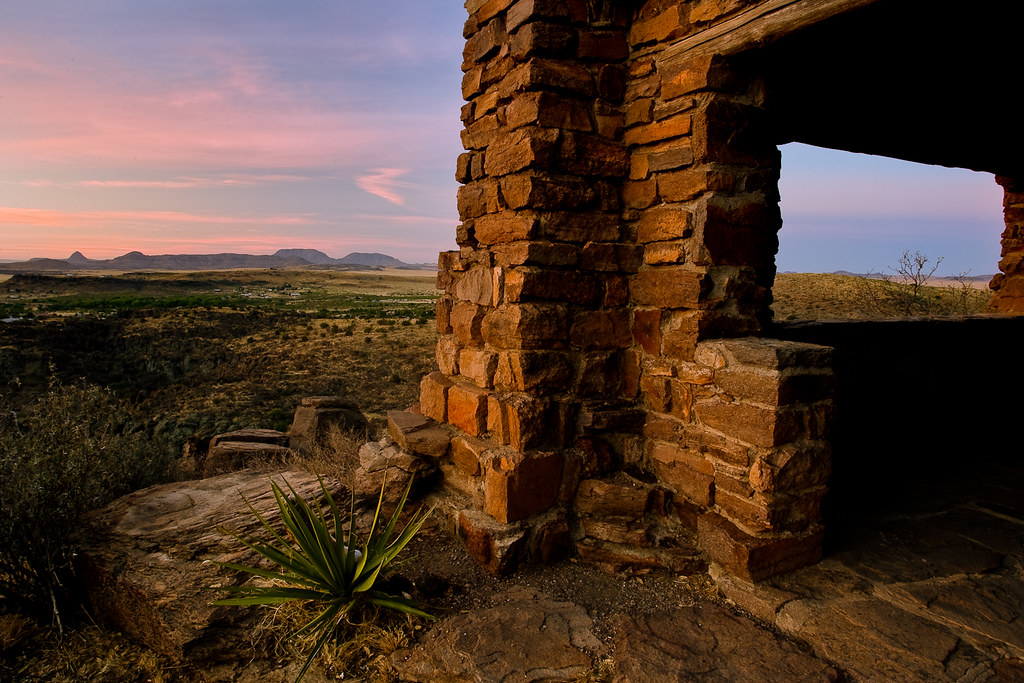
Many years ago I learned to shoot pretty wide brackets around a given exposure when I'm working on a tripod. With digital, the brackets are essentially free and this ensures you have all the data you might need to merge exposures back at home. Particularly when working with fleeting light or in hard to get to locations, I'd rather shoot a few more frames at the time, than wish I had them when I got home. I'll typically pick a working f-stop, based on the depth of field I want in the scene, then shoot at one stop intervals around the metered exposure, from -2EV, -1EV, 0, +1EV and +2EV. I normally do this in Aperture Priority mode, so that only the shutter speed is changing, but the depth of field is constant. In some cases, if there are particularly extreme lighting situations, I might shoot another stop above or below those as well, but I've found that five stop increment is often more than I need, particularly shooting around twilight. These 5 exposures give me a great starting point to blend for a final image. In the past I might have processed them as multiple exposures and then layered them in Photoshop, using masks to pick out particular parts of the image. Now they are a great starting point for Enfuse. In the example above, the porch of the building was in really heavy shadow, in the noon day sun, so I've shot 6 exposures, to get some detail and deep colour in the shadow areas (in the lightest exposure, to the far right), while still trying to keep some detail in the white, reflective roof (in the leftmost exposure).
To run the merge, I pick the darkest exposure that still had the right levels for the lightest parts of the image and the same at the other end, selecting the lightest exposure that had the shadow values that I wanted. I then use those as the outliers and pick all the in-between exposures and run the Enfuse plugin. I haven't tried varying the default values yet, as it has given consistently good results from the images I took in Big Bend. Enfuse is a great option if you are interested in working with scenes with a large range of tonalities or extremes of lighting, but want to try to produce more natural results. The price is right too. There are other GUIs available for Enfuse, if you don't like using Lightroom. I haven't had any experience with these, but options such as EnfuseGUI do exist if you wanted to avoid Lightroom and also the command line.


4 comments:
I must say that these do not look like HDR at all! That alone, makes me want to try Enfuse.
BTW, the image at the top is just wonderful! Very peaceful and beautiful. It looks like a great place to sit and ponder.
Both of these images are wonderful. Like Paul, I want to visit that first spot. While I periodically see HDR images that I like very much, I have stayed with my multiple smart object copies. I agree that too often the results of HDR are cartoonish. Moreover, I would never have the courage to use an open-source program without a recommendation from a deeply trusted source. This is a persuasive post. You have provided another strong push toward taking on a new program.
Great HDR work. I have been rather disappointed with the almost cartoonish look to so much HDR work I find on the web, but yours look very, very natural.
I'll have to look into your choice of Enfuse as it seems to do a much nicer (i.e. natural) job.
I have just started using it and am happy with the results. I used to do it all manually in photoshop but this is so much easier. My only problem is chromatic aberrations (purple fringing etc) say around a window frame where there's contrasting exposures. I wonder if I need to bracket more? I used to fix the fringing in bridge/photoshop. Can anyone enlighten me?
Post a Comment