Monday, March 31, 2008

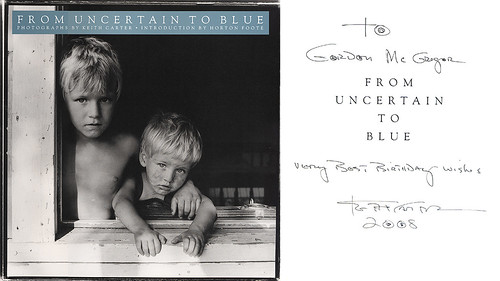
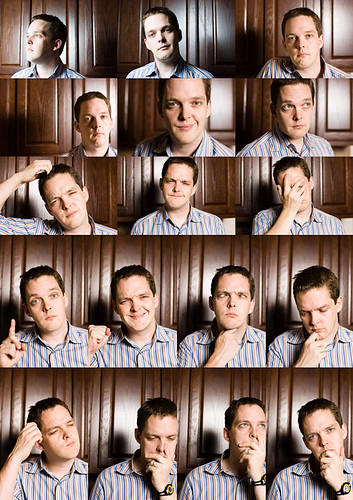
Hi, I'm making a book and I'd like you to be in it

zion
I officially started my SoFoBoMo project a wee bit early, on Saturday March 29th. More specifically around about 2pm (just in case I need some extra wiggle room at the end.) Things are going well so far. I took about 600 shots this weekend (though not all SoFoBoMo related!) and have winnowed those down to about 68 finished keepers, which will be 34 pages in the final book based on my current layout plans. Even if they all don't make it into the final book I feel I've got a bit of buffer room now. Some of the stress of finding enough participants has eased. Everyone I've asked so far has been excited about the idea and happy to participate. I feel I've got some momentum going now and the shots are starting to come together. So far 17 people have been kind enough to pose, act up and out and generally have some fun in front of my camera. I think I'm off to a good start.

SoFoMoBoGoGoGo

rodney
Practicing an art, no matter how well or badly, is a way to make your soul grow, for heaven's sake. Sing in the shower. Dance to the radio. Tell stories. Write a poem to a friend, even a lousy poem. Do it as well as you possibly can. You will get an enormous reward. You will have created something.
A Man Without a Country - Kurt Vonnegut
At its worst, SoFoBoMo should be like that.

Sunday, March 30, 2008

the candid frame

dorian graydorian graydorian gray
Ibarionex Perello keeps plugging away with his excellent series of interviews over at The Candid Frame. He has been producing these interesting and in depth podcasts for almost two years now and is on the 49th episode. Well worth dipping into the archives if you haven't heard them before. He talks to a wide variety of photographers, working in different styles and with different goals. There is a lot of insight into the process and working life of these creative people that I've found inspirational and entertaining. He's had a few technical hitches in the last couple of months but things are back on track with a great interview with Erin Manning that delves into her approaches for working with people and interacting and getting the expressions and shots that she wants. Good stuff if you are interested in getting better at that aspect of photography. A great podcast and worth the download. I always look forward to the next interview. You can stream interviews from his blog, or subscribe to them via iTunes.

Friday, March 28, 2008

flickr set parser for GPSVisualizer

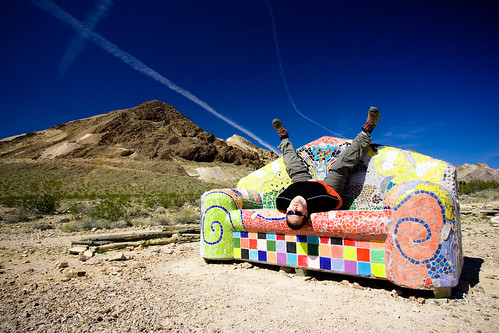
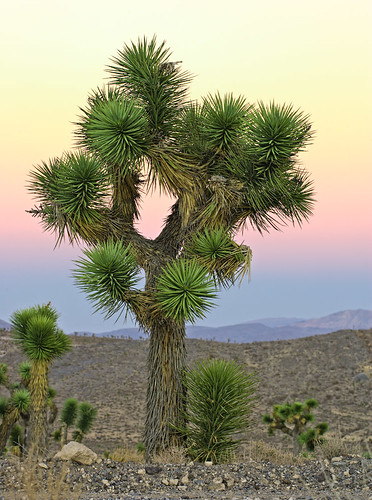
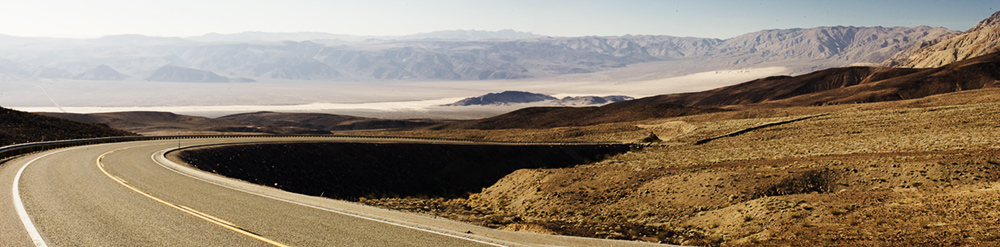
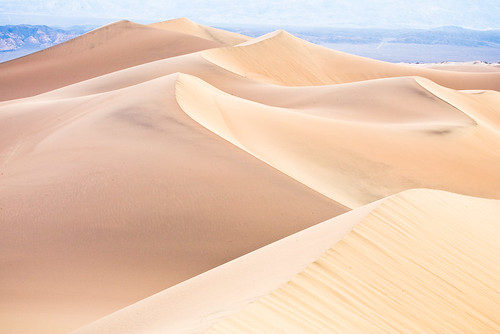
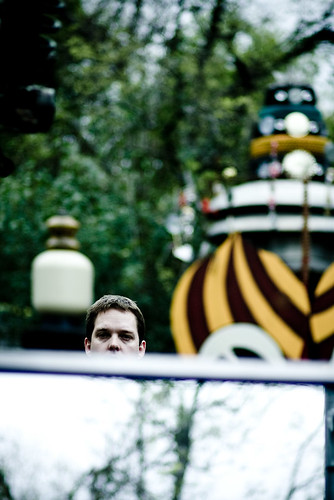
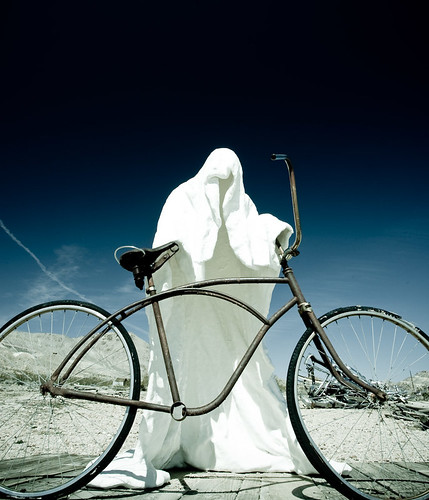
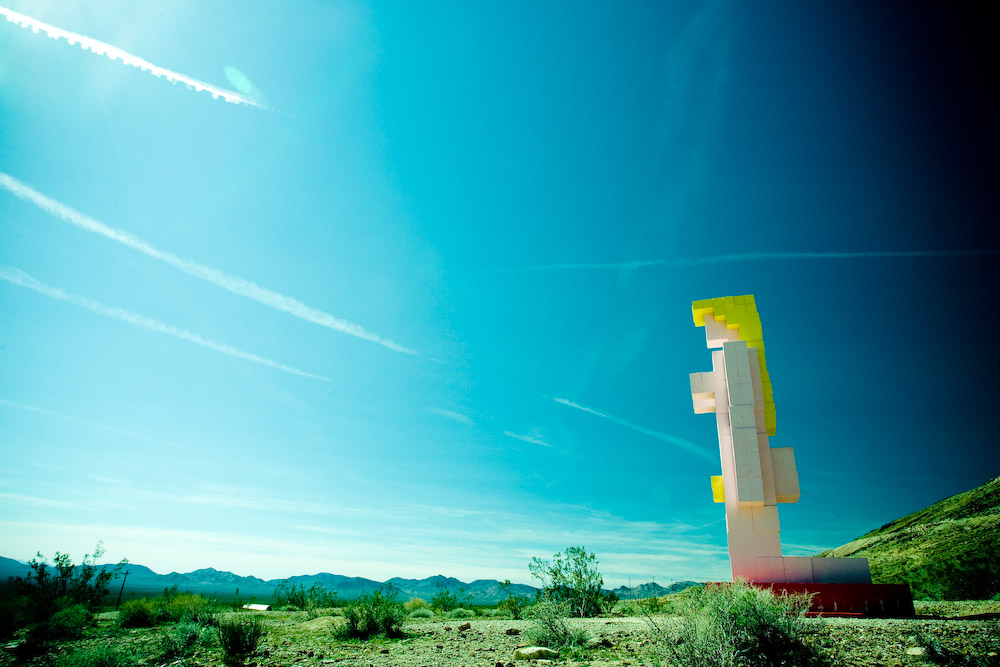
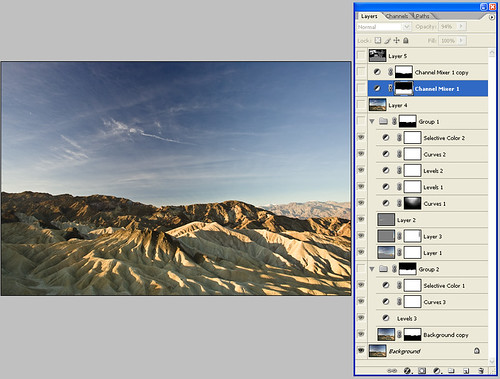
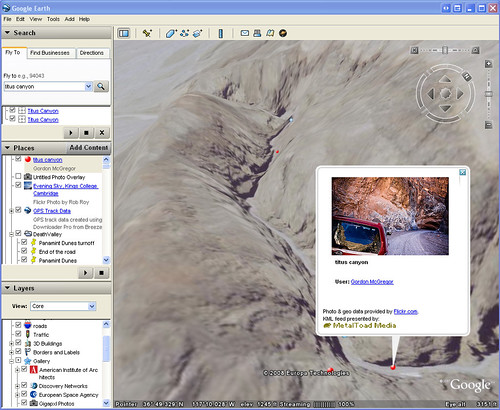
Geekier than normal post today. If you aren't interested in python programming, flickr's API and GPS display of images in Google maps or Google Earth then I'd stop reading now. Here's another picture from Death Valley. See you again tomorrow.

Right. Still here ? I've been using GPSVisualizer to combine a GPS tracklog, with geotagged images on flickr. Images are entered into GPSVisualizer as a series of CSV values, in a fairly flexible format. The first line provides the layout:
latitude, longitude, name, url, thumbnail, desc
Each line after that is one entry for an image, with the location in decimal degrees, followed by various text fields containing the description, title and links to the actual image. For example:
36.366953, -117.391867, "shot up car", "http://flickr.com/photos/mcgregorphoto/2355449153/", "http://farm3.static.flickr.com/2323/2355449153_c733f5ee1e.jpg", "a long way from nowhere, burnt out and shot up, just off the access road"
36.442947, -117.435447, "half way point", http://flickr.com/photos/mcgregorphoto/2356283640/, http://farm3.static.flickr.com/2388/2356283640_be78036888.jpg, "lunch about half way into the hike"
Initially I generated this file by hand, extracting the EXIF location from the image files using exiftool. I then went through each image, entered a title, found the URL for the image on flickr, extracted the URL for a thumbnail image and added a longer description. This was painful to say the least. It was only 16 images but it was a pain. Particularly as all the information was already there, in a flickr set. So I looked up the information on the flickr API, found a python library to access it and wrote the script below in half an hour. Given the URL or set id for a flickr set, it iterates over all of the photos and produces a CSV formatted list that's suitable to load straight into GPSVisualizer. This can then be linked along with the original GPS track log to generate a map with images and also the path traveled. It can be used for both Google Earth and Google maps path generation and runs pretty quickly. I'm posting it here in case it proves useful to anyone. To run, you'll need an up to date python install and additionally will need to download and install the flickrAPI for python. The final step is to obtain an API key for flickr. This key has to be added to the script, in the marked location. Once installed the program is run with:
python flickr2gpsv.py -s set_id > results.csv
or, alternatively,
python flickr2gpsv.py -s http://www.flickr.com/set_url/ > results.csv
If you find this useful, please let me know. You can download the script here. (probably better than cutting and pasting from below, because the download will keep the correct indentation). The archived version also includes a patch from Brad Crittenden to add unicode support.
# Author : Gordon McGregor
# Contact: http://gordonmcgregor.blogspot.com
#
# License : public domain
#
# Purpose: parses a flickr set to extract information to generate a map overlay, via http://gpsvisualizer.com
#
# Usage: python flickr2gpsv.py -s 72157604221838137
# or
#        python flickr2gpsv.py -s http://flickr.com/photos/mcgregorphoto/sets/72157604221838137/
#
#   If the URL is given, the set_id is automatically extracted

# Typically, you'll want to  redirect the output to a file, as errors & comments will appear on stderr (not in the file)
#
# e.g., python flickr2gpsv.py -s 72157604221838137 > output_list.csv
#
#
# only generates entries for photos with geographic information attached
#
# Required libraries:
# the flickrapi python libraries, from http://flickrapi.sourceforge.net/
# installation info here http://flickrapi.sourceforge.net/installation.html
#

import flickrapi
import time

import sys
from optparse import OptionParser
from urlparse import urlparse

# enter your api_key here to connect to flickr
# obtain one from http://www.flickr.com/services/api/keys/apply/
#

api_key = 'your_key_goes_here'

def getURL(sizes, size):

for element in sizes.sizes[0].size:
if element['label'] == size:
    return element['source']

raise flickrapi.exceptions.FlickrError, "No " + size+ " URL found."

# the main routine
# pass in a flickr set id
# outputs the appropriate data for GPSVisualizer to stdout
def parseSet(set_id):

cnt = 0

flickr = flickrapi.FlickrAPI(api_key)

photoset = flickr.photosets_getPhotos(photoset_id=set_id)

# iterate over list of photos in list

print 'latitude, longitude, name, thumbnail, url, desc'
for photo in photoset.photoset[0].photo:

try:
# get the various bits of data

    sizes = flickr.photos_getSizes(photo_id = photo['id'])
    info  = flickr.photos_getInfo(photo_id =  photo['id'])

# extract the required fields
    try:
        lat = info.photo[0].location[0]['latitude']
        lon = info.photo[0].location[0]['longitude']
    except AttributeError:
        raise flickrapi.exceptions.FlickrError, "No Geographical data found."

    name = photo['title']
    thumbnail =  getURL(sizes, 'Small')
    url = info.photo[0].urls[0].url[0].text
    desc = info.photo[0].description[0].text.strip()  # strip to remove extra newlines

    if(len(desc)):
        print '%s, %s, "%s", "%s", "%s", "%s"' % (lat, lon, name, thumbnail, url, desc)
    else:
        print '%s, %s, "%s", "%s", "%s",' % (lat, lon, name, thumbnail, url)
    sys.stderr.write('.')
    cnt = cnt + 1

except flickrapi.exceptions.FlickrError, e:
    sys.stderr.write( '\n'+photo['title'] +' : ' + e.__str__() + ' Skipping.\n')

return cnt


def main(argv=None):
if argv is None:
argv = sys.argv

usage = "usage: %prog [options]\nPass in a flickr set to produce output suitable for GPSVisualizer's google maps overlay"
opt_parser = OptionParser(usage=usage)

opt_parser.add_option('-s', '--set', dest='set', help="flickr set to process (full url or set number)")

(options, args) = opt_parser.parse_args()

if(options.set == None):
opt_parser.print_help()
return 1

# treat the command line value as a url
url = urlparse(options.set)

# even if it is just a set id, the value ends up in field 3 after urlparse (url[2])
# this removes any trailing /, explodes around any remaining /'s and takes the last value [-1]
# works for a full URL or simple set id
set_id = url[2].strip('/').split('/')[-1]

if (not set_id.isdigit()):
sys.stderr.write("set_id" + set_id + "is not a number. This is not expected.")
return 1

sys.stderr.write("Processing set id "+set_id+"\n")
start_time = time.time()
num = parseSet(set_id)
end_time = time.time()

total_time = end_time - start_time

average = 0
if(num):
average = total_time/num

results = "\nProcessed %d valid photos in %0.1f seconds (%0.2f seconds/photo). Finished.\n" % (num, total_time, average)
sys.stderr.write(results)

if __name__ == "__main__":
sys.exit(main())

Wednesday, March 26, 2008

high dynamic range - it's not just for Saturday mornings

3 image hdr
I've never really gotten the taste for the typical High Dynamic Range images. Trey does a great job in that style, but it just doesn't connect with me. So I've tended to avoid HDR tools. Occasionally, however, I get presented with a scene which is beyond the dynamic range my camera can handle. Usually I'll bracket the exposure then mix the images later with masks. Recently I signed up for a beta program of a new HDR tool. Most of the default results from the tool have the typical extremely high local contrast look that seems so popular to add in the tone mapping stages. But it can be dialed back and controlled to give a less obvious effect. I found I was able to blend several exposures without too much trouble, to get something much closer to what my eye could see, but without the overloaded local contrast in the image.
2 image hdr
I'm no expert at HDR (I think I've been happy with three final images in total) but it can be a useful tool to have in the back pocket, particularly when it can be used without being such an obvious part of the final result.

SoFoBoMoSho

SoFoBoMoSho

With the start of the project fast approaching, Paul Butzi exhorts people to 'blog like crazy' about the process. That's certainly going to be part of the whole experience. Sharing the ups and downs of trying to get this together as part of a group of other people having similar issues. If we all work on overlapping periods, it should push us onwards. Knowing that other people are expecting to see the finished result will provide motivation to get it done. One thing I'm pondering is sharing images in progress - will the final result be better or worse for sharing the images ? If I get a great image along the way, does it diminish the impact to share it before it gets into the final collection ? Just show rejects or share everything. Keep it under wraps but talk about it a lot. Any thoughts on that ?

Tuesday, March 25, 2008

SoFoBoMoExpresso

Well the new black for Sofobomo blog posts is saying what you are going to do. Makes sense, better than starting early I suppose. So here's my latest idea, hot off the presses of my drive to work this morning. All along I've been planning on shooting portraits. It's what I mostly do after all, all these recent landscape and GPS posts aside. So portraits. That's it. Well, I decided that I needed something to push me just a shade further. I'd thought about questions to ask, or other ways to expand on the interaction. Looking at my square sample book I was struck by the space down the side of a normal rectangular 3:2 ratio image. Room for three more smaller pictures to make everything square again. I've noticed on occasion that I don't take enough pictures of a person, particularly if I ask them cold if I can take a picture. One, maybe two, then off. So I'm planning on pushing just a slight bit further with my SoFoMoBo plan. I'm going for Expressions. Photo expressions. More than one, hopefully four in total. A central image, then three additional contrasts along the side. There's a school of thought that might think that all I need to do is find 9 people then - I'll have 36 pictures and have reached the 35 requirement for SoFoBoMo. But really, I think it is 35 pages, rather than 35 images. I'll see how that goes. 140 images, or 35 - maybe somewhere between those extremes. Layout could go in several directions. All 4 squared away on one square page. One full bleed and three accompanying on the facing page. Other permutations. That's to be fleshed out when I have some source material. For now though, I have an idea that pushes me along a path I've already been traveling along, but takes it a hopefully easy notch further. Equipment is always the same. Canon 1DMkII, Canon EF 85mm f1.8 lens. Shot somewhere around f2-f2.8 or so. Handheld. Big CF card. Keep it simple.

SoFoMoBoCheapo

More of a 2 for the price of 1 deal, rather than 'one book free' but it might be useful for anyone doing the SoFoMoBo thing. Offer info is here. I'm not endorsing or reviewing mypublisher here, just passing on the coupon offer. They may well spam your email to death too. I suggest using a disposable email account, such as those available from Spamgourmet.com

Sunday, March 23, 2008

birthday in the valley

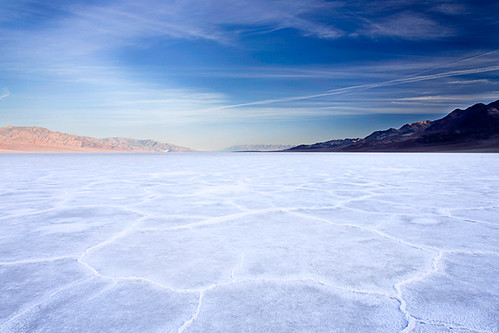
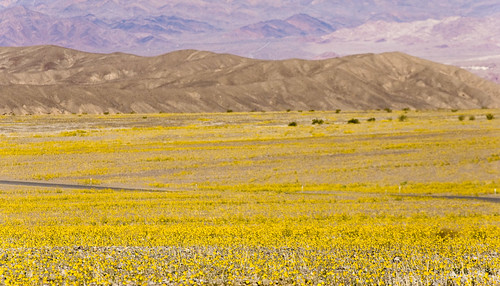
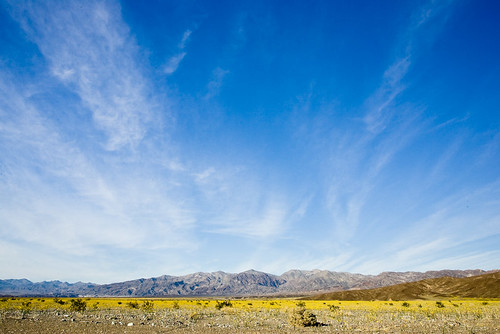
One of the reasons I went to Death Valley at the beginning of the month was to spend my birthday out there. Amanda was away for work and I wanted do something, rather than sitting around the house! I spent the first few days doing a bit of short hiking and taking a lot of pictures. I wanted to try something a bit more adventurous on my actual birthday. I got up bright and early on the 4th, at 4:30am and headed out to the Badwater salt flats to shoot the pre-dawn and sunrise. A quiet, soft start to the day and almost nobody out there. I walked out further than I've been before, about a mile and a half, to where the salt really gets flat and white. Peaceful, beautiful and not a sound. Amanda recorded herself singing 'Happy Birthday' on my birthday present, a digital audio recorder, so I listened to that a few times out there!

After breakfast and a bit of packing, I drove over to the Panamint Valley. Both times I'd been to the park before I'd looked longingly at the Panamint dunes. They are a bit tough to get to - about 6 miles of dirt roads then another 5 mile cross country hike, over a rocky alluvial fan then up through sand dunes. You can see the road in the distance on the far left of this shot and then the dunes on the hillside to the far right. This time I was going to get there.
The hike was great - I took about a gallon and a half of water, my camera and some food and set off up to the dunes. It was a warm 85F and sunny at the start and got pretty hot as the afternoon wore on. Click here for a flickr slideshow of the hike. The soft dirt and sand made for quite tough going and I averaged a slow 2.5 mph on the way up. Just before the dunes, I found a big creosote bush and slept under it for an hour while the shadows lengthened and the light got better for photos. My Tilley hat made for a great shade, hung up in the branches of the bush. That was the first respite from the sun I'd found all afternoon and it was really welcome. So much cooler out there out of the sun with the really low humidity. Lovely. About 3 pm I left the pack behind and walked up into the dunes with my camera. It was a beautiful experience to have that whole expanse of dunes to myself, no foot prints, no people, no noise. Nobody for miles around. The dunes there are steeper than those near Stove Pipe Wells, the hillside and wind have combined to really pile them high and sharp. A couple of times I wasn't sure I'd be able to make it to the top of the highest dune, I almost rolled off down one slope. Eventually though I clambered to the top - the view was stunning - all the valley opened out below me. The narrow peak of the dune actually split into the 3 spines - a star shaped dune! Shooting right at the top was a bit disorientating, looking through the camera and trying not to step off into space. I sat for a while and drank it all in.
Heading back down was a whole lot easier, once I found my pack. Creosote bushes all look the same from a distance! A GPS waypoint made life easier, though I did worry about my batteries dying. It was all downhill to the car and not so much weight to carry either. I think I need to find some hikes where I start off at the top, hike down drinking the water then have a lighter load to carry up the hill! I got back to the car just as the sun dipped behind the mountains. All in all, a great way to spend my birthday. A really beautiful desert hike.
Lots more pictures in the map below - click on the labels on the right or zoom in and pan around.
I've been trying out various GPS tools and GPS Visualizer has been really useful. Massaging the data into a form to create the map above took a bit of work, some use of GPSBabel and a few custom python scripts that I wrote to convert co-ordinates into the right forms. The profile came straight from the GPS track log.

Saturday, March 22, 2008

australia

badwater

badwater basin before dawn.

Friday, March 21, 2008

dune dawn

dawn

Early morning light, at Stove Pipe Wells dunes, Death Valley national park. Dawn is special to me - most people are sensibly tucked up in bed, asleep. The light is softer, creeping across the land. Sunsets are easy. Everyone is up and about for them, everyone shares in them. But dawn is special, solitary, beautiful. My favourite time of day - when I can get out of bed.

Thursday, March 20, 2008

sunspot

sunspot sunspot sunspot
One of the bands I enjoyed the most at my brief time at SxSW was Sunspot. From Madison, WI, they were obviously enjoying the warmer Texan weather this weekend. I listened to several of their songs at Agave and picked up a CD which has been playing for most of the week in my car. They are self-described as arena rock for geeks and their music reminds me a lot of They Might be Giants or Weezer. Catchy, funny lyrics and good tunes. You can listen to them at the link above. In particular the homage to Quantum leap, Scott Bakula, is a fine track, with the lyric 'Scott Bakula never smoked crackula, he played quarterbackula in 'Necessary Roughness'. Worth checking out.

Wednesday, March 19, 2008

dawkins

dawkins

How I spent my Wednesday evening. I turned up at 6:30pm for the 7pm lecture. The lines stretched across the UT campus - I was quite stunned by how many people had shown up. I bumped into a couple of people I knew towards the front of the line who mentioned that the queues started forming to get in around 3pm. I didn't have a ticket - I expected a half empty auditorium and a few unenthusiastic people picketing the event. I meandered to the back of the line and didn't expect to get a ticket or a seat. Eventually the word filtered back that the place was full, nobody else would get in. We shrugged and headed towards the car. Along the way we noticed more people than expected had also given up, leaving quite a shorter line, so we jumped back in towards the back. Somehow, some way, SJ batted her eyelashes enough to get us VIP entry tickets (apparently a red slash means a whole lot in these cases - take a red pen everywhere). We got to jump ahead of all the other people still in line. We got ushered past most of the already seated students down to a few rows from the stage. Funny how that works. The presentation was interesting but nothing new if you'd read the God Delusion - in fact I think this is probably a book tour, for the paperback release, in disguise. Dawkins is an articulate, engaging speaker, not unlike many of the professors I was lucky enough to learn from growing up. I do tend to think he's a better evolutionary biologist than an atheist evangelist, but that didn't seem to be what most of the audience were there for. The dribbley combination lock analogy for how natural selection works was painful. There's dumbing down then there's insulting the audience. Surely he has a better analogy in his many books ? I was amused to note quite a few disappointed looking members of the audience as I left - almost as if they'd been expecting some sort of religious experience. The highlight was possibly being one of the 5 people in the packed auditorium who knew who Ant & Dec were and why they should never be apart. No fights broke out. The questions from the audience were fawning and a bit rambling. All in all and entertaining lecture that I didn't expect to be able to get in to at all. Still the best argument:

trial balloon: experiences with blurb.com

I've been ruminating on a couple of book ideas; for SoFoBoMo and another in progress and wanted to try out blurb.com as the printer. They seemed like one of the few PoD companies that would do decent photographic prints while also being geared up to at least allow some resale. I have a notion of creating a teaching book that people could purchase and blurb.com might well be a good outlet. I can revise and update the book as I go along, releasing new versions and potentially if there is interest use it as an avenue in to showing a publisher. I've tried other PoD companies, such as lulu.com and was very disappointed in the print quality. I've actually seen blurb.com books in person at trade shows and was reasonably impressed. The booksmart client software that they provide is not terrible. I don't relish the idea of authoring a book with much text in it though - in terms of desktop publishing support it is pretty basic. I think I'll use Adobe InDesign for layouts, then just paste full-bleed pages into blurb for a final print version. However, for this sample, I took a simpler approach. One picture per page, full bleed with a black background for the remainder of the page. I picked a somewhat funky font, made it large and kept things simple. For the book, I picked the cheapest hardback sample that I could put together, 7" square book, with about 15 pages - you could do more pages for the same price - up to 20 for the cheapest book - then you start paying an incremental cost per page. As this was a trial, I thought that would be enough. I selected and edited the images in Lightroom then exported them to Photoshop for a final tweak and colour profiling. The one thing I have heard are lots of horror stories about bad colour from blurb and other PoD companies. I'd found a colour profile for their printer and picked a challenging image for the cover - bright, lime-green with magenta highlights. Perfect. I switched on the soft proof in Photoshop and the defaults looked terrible. Muddy sickly yellow. Anemic colour, flat highlights, muddy shadows. But with a bit of tweaking, some selective colour adjustments to move away from the real lime green to another apparently printable green and some additional contrast, things were looking much better. I went through the same process with all the images, doing some radical adjustments to the original image, just to get it back to close to how I wanted it in the soft proof. That always concerns me, but I thought I'd go along with it.
Assembling the book was straightforward in booksmart. I uploaded the final version after some previewing and bought a copy. Surprisingly, the book shipped only a couple of days later - I'd expected a longer lead time. The book arrived in decent packaging, quickly and without any problems. There I had it, a few days later, a book of my photos! First thing is to notice how fantastic it is to have a hardbacked book of your images. There's a certain thrill to that that is difficult to replicate with online displays or even individual prints, mounted and framed or not. I know all I did was pay some money, there's no real validation involved, but it sure looks good! I've put together a few books for different purposes and the feeling hasn't gone away yet. The second thing to note is that 28 sides (14 pages) isn't very many. You end up with quite a slim volume, particularly in hardback. All cover and no content, if you aren't careful. The slip cover looked great - particularly that green I'd been worried about translated very well, close to how it looked in the soft proof. I'm impressed with how similar it all turned out - throughout the book. On the other hand, I think if I'd uploaded straight, unadjusted sRGB versions of the files I would have been quite disappointed. Some of the original colours just wouldn't have worked out at all. Blurb doesn't make a big deal out of mentioning this - it is there on their site, but they certainly don't push colour management and soft proofing. Something to watch for. The print quality is certainly not as good as I can get from my inkjet (an Epson R800), but is certainly well above acceptable on most of the images. There is a slightly visible cross-hatching in the smoother areas of some images, if you look particularly closely, but from a normal viewing distance all of the images look great. Some of those that were slightly less sharp than others really become more noticeable on the printed page. Also higher ISO black and whites lost a lot of the presence and depth that they have online. They just don't translate too well, the noise becomes more noticeable, the contrast isn't as strong and they just don't have the same amount of life. The one disappointment for SoFoBoMo is that booksmart isn't a simple way to get a PDF of your book. At least, not without a large watermark through each page. using pdf995 I was able to get a final PDF of the book from booksmart, but the layout is not great and the watermark is very visible. Might do in a pinch, though. I also made one rookie mistake, putting something too close to the edge of the slip cover. The cropping is probably about a quarter of an inch tighter than the previews - certainly you are well warned about this but I almost lost an eye from the cover! This particular book has a bar code printed on the rear. From blurb's blog it appears that different printers and different books may or may not end up with this bar code. I've also read that all of the books larger than 7" are printed on a slightly better printer, so the quality should improve even over this quite acceptable start. The binding seems solid, the book feels like a real book. The pages appear to be glued and stitched into a cloth-backed hard cover. It all looks professionally put together, though a bit skinny. A 14 page book cost $22.95 for the 7" hardcover, plus $8 shipping. It is the same price, up to the first 40 sides. Note that blurb refer to pages as each side of one physical piece of paper being one page for the cost calculation. An additional $3 doubles the page count and the book would start to feel more substantial. White space is your friend. Overall I'm happy with the results and plan on using blurb for a final copy of my SoFoBoMo book.

Tuesday, March 18, 2008

the great cheese race

Amanda will attest to my love of cheese. This event is one of the things I'd love to participate in or photograph. Some day.

photography. book. now.

wildflowers

If your SoFoBoMo book happens to be better than just good enough, this might be an interesting home for it. Blurb just announced the PhotographyBookNow contest. Closing date is July 14th. Rules and FAQ didn't look like some sort of rights grab, at least at first glance. The photo ? It's another one from Death Valley. I've never seen it look like this before. A dramatic change from the rock and mud I found on the last trips. I feel lucky to have turned up at the right time, mostly by accident of birth.

good enough

enchanted forest
SoFoBoMo. What seemed like a great idea when it was several months (and fuzzy months at that) away is now starting to loom large. Angst ridden posts about not good enough ideas or concerns about not good enough pictures that haven't yet been taken are popping up on the blogs of the various participants. It seems to be a stressful time to be called Paul in particular. I'm not called Paul, but I am starting to feel that same will it be good enough pressure. I haven't even taken a picture yet and I'm writing off the images as somehow not worthy or the concept too boring for anyone to want to see. Perhaps I'm more concerned that people will actually want to see it, then get disappointed when they do. Fearing the work isn't good enough before the first shot is taken - isn't that where procrastination springs from ? Aren't these the exact feelings that SoFoBoMo is geared to helping us move through ? The deadline is real. The deadline is short - so we'll just have to get on with it regardless. No chances to third or fourth guess the book concept (I'll leave a chance for a first, second guess of it after a few days and images). No real opportunity to find that you don't have enough pictures and need to reshoot for months on end. You've either got the pictures or you don't. If you take them, I'd suggest that they'll be good enough. Good enough should be the motto for SoFoBoMo. Not perfect, not your best work of a lifetime, just good enough. Good enough to pull together and show to people. Good enough to wrap up into a book. On the flip side, it will all have been put together in only a month. You can always use that as the excuse for why it isn't amazing. If it is amazing, then that is even better, but good enough is better than didn't finish, or gave up half way. I'm feeling my own doubts and concerns. This pep talk of a post is aimed more at myself than anyone else. I have to find 35 people. I have to find and ask 35 people. I have to find 35 people, ask them and have them say yes. Then the pictures actually have to be any good. So that probably means asking 70 people, for all the upfront rejection and subsequent rejected pictures! It'll never be good enough. Must be time to write my own angst-ridden blog post about SoFoBoMo and changing my idea. But I'll find the people. They'll say yes. The pictures will work. It'll all be good. SoFoBoMo. It'll be good enough.

Monday, March 17, 2008

work in progress

Austin

There is a SoFoBoMo group on Flickr now, if you want to share your images and the process as you go along.

Saturday, March 15, 2008

sharpie

sxsw

Every year Austin stages the South by Southwest music conference. The place gets invaded by thousands of bands, music reps, journalists and photographers. Sixth street turns into a zoo. Good place for pictures! I never did find out why they'd given themselves sharpie moustaches...

Friday, March 14, 2008

happy π day

train car detail

Yes, sadly enough, I waited until exactly this time to post it too. Here it is to the first million places for starters.

ghost rider meets Venus

I should probably do something about the rather harsh posterization going on in the Lady Venus shot above. Pushed the colours quite far in Lightroom. That's the one thing I miss in LR, the ability to easily fix up things like that with a lasso and some Gaussian blurring + noise/ dithering. I'd probably also burn down the left hand side to balance the more polarised dark sky on the right. I love what the polariser, combined with the bright desert sky and low angle is doing in the ghost rider shot. I did drag it a bit further to the dark side too, feels like it fits with the theme.

Wednesday, March 12, 2008

zabriske

zabriske

Got up early on the first morning and went to Zabriskie Point. Never really been that enthused by the view out over Manly Beacon (to camera right). It always seems a bit uninspiring when I've been there. This time the badlands off to the left were more interesting, particularly with the cloud formations overhead. I'm interested in comments on this one - I'm not entirely convinced by the composition.

Austin Strobist GTG

Video from the latest Strobist GTG in Austin. We've got a good group, going places!

Tuesday, March 11, 2008

titus canyon

One of the fun things about visiting a National Park on my own was being able to set my own schedule. I could go where I wanted, when I wanted. Rather than on a workshop, where locations are dictated by the group or instructor, or with friends where photography is a reasonable last place. On this trip I could take my time, stop when I was interested in the landscape, take some pictures, scout out potential new areas for future shoots. There was time to just slow down and enjoy where I was. Workshops are a hugely creative, energetic experience but there isn't a whole lot of time to think or explore. The mid-day hours are given over the classroom work or critique and the rest of the time is a rush between shoots, sleep and food. On this trip to Death Valley I had a chance to go to some places I hadn't been before, including doing the 26 mile drive down through Titus Canyon. I left the park and made a trip to Rhyolite to shoot around there and had lunch, then set off down the 4WD only access road to the canyon. The sun beat down from a mostly cloudless sky but it was a still a pleasant 80F in the shade. The road wasn't particularly rough going and the scenery was breathtaking. I was amazed how much it changed over the drive, as I twisted and turned towards the small ghost town of Leadfield. Along the way I saw a red tailed hawk of some kind catching and circling above me with a snake in its talons. It soared on the strong breeze and just hung in the air over head for several minutes. I'd had enough of ghost towns with Rhyolite, so didn't stop in Leadfield. There were a few tin shacks and I'm sure some interesting things to explore, but I pressed on. After Leadfield the landscape changed quite quickly as the road dropped down into the real canyon. The walls got steeper and steeper and closer and closer. The early afternoon sun started to dip behind the canyon walls, giving some relief from the constant sun. The bouncing light between the canyon walls softened and picked up the orange glow of the rocks. Still the road wasn't particularly bad - certainly required high clearance in some places but nothing particularly testing, as it was dry. I found some petroglyphs by the roadside and stopped for a look. Unfortunately they are well marked and as a result have been added to by plenty of visitors.
Nearing the end of the canyon it got particularly narrow, finally birthing out onto an alluvial fan on the side of Death Valley. There's a small car park at the start of the two-way access road. I parked and walked back into the canyon a bit. The narrow canyon walls loomed over me and I was listening for cars all the time - there wasn't much room to get out of their way!
Titus Canyon was a really enjoyable drive, easy on the car and easier on the eye. Dramatic mountains, steep cliffs, red earth and black rock really add to the whole experience. I saw a few other people in there but mostly I was on my own and had a great time, traveling at my own pace. As I uploaded the images to Flickr, decked out with the appropriate GPS co-ordinates, I took a couple of screen captures of how the images appear in Google Earth and also on the Flickr mapping tool. Still exploring what is possible with the geotagged images. Being able to find them in Google Earth is interesting, seeing what other people have shot in the same area is particularly useful.

stove pipe wells

stove pipe wells

This was taken towards the end of the first full day in Death Valley. It had been extremely windy the night before and was still pretty breezy that morning. That might not sound ideal but it sure cleans up all the footprints on the dunes. These are quite close to a road and get a lot of foot traffic, so it is quite rare to get to photograph them without foot prints criss-crossing all over them. I like this particular shot because of how the cloud formations and shadows in the mountain are echoing some of the cracks in the mud. The shape and slope of the dune is also reflected in some of the deep cracks in the mud and the low angled late evening light warms and defines the deep splits in the dried mud. On this trip I realised that the dunes run diagonally along side the road - previously I've parked at the closest point and slogged up and down over smaller dunes to get into the middle of the field. Doing some scouting ahead of this trip on Goggle Earth I was able to see that if I stopped down the road, actually further away from the dunes, I could walk in along the ridges of the dunes. That made for a much easier time! I had to walk maybe a mile but it was over flat, hard packed mud, rather than hiking over the dune fields. It also let me find these great mud deposits that were a lot more expansive and thicker than I'd seen before. This time I approached from the upwind side, so sand hadn't really covered the mud and also I think this side is where the prevailing mud flows come from, so there was a much larger expanse pushing up against and no doubt being stopped by the dune field. The Google Earth scouting via satellite and road maps was really useful on this trip. I was able to mark specific way points then upload them to my GPS. Certainly helped me find my way around on the various small dirt roads and tracks that I got to investigate on this trip.

Monday, March 10, 2008

contrast

wildflowers

I was amazed this time around when I got to Death Valley national park. In the past it has been a beautiful, desolate landscape. Nothing but mud and rocks with the occasional creosote bush to break up the scene. The sun bakes down from a typically cloudless sky and the temperatures can soar to 130F and beyond. This time there was a carpet of 2 foot-high, yellow flowers across the whole of the area around Furnace Creek. They stretched all across the flood plains and up through the small valleys in the foothills. I noticed a particular increase in the density of the flowers around the roads. I'm told that cars driving along increase the local humidity around the road due to the exhaust moisture from the engine. grand
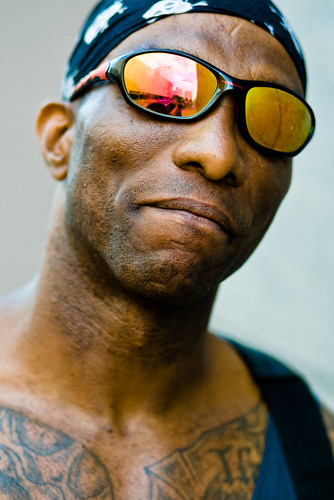
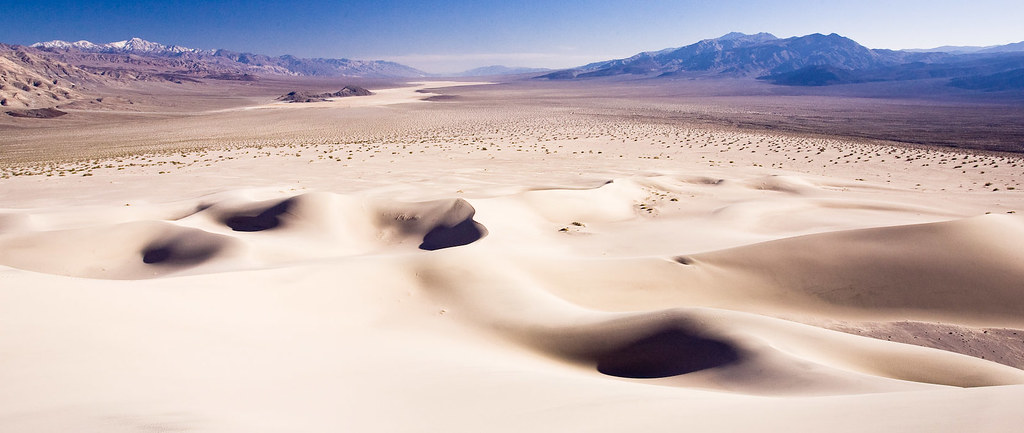
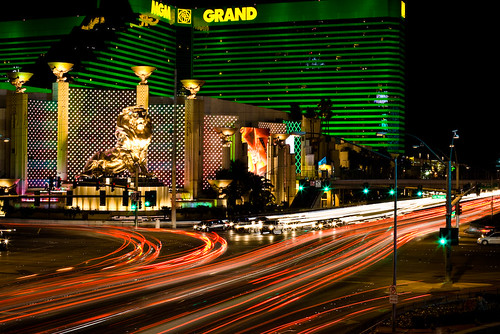
The wide open skies and flat desert was quite a contrast to the scene the night before in Las Vegas. I met my friend, Marti, at the Vegas airport and then we went for a walk around the Strip to find some dinner and do some shooting. I didn't take a tripod but managed to find enough ledges and walls to perch my camera on to get a few long exposure shots that I'm happy with. These days, the best thing about Las Vegas is using it as a jumping off point to all the amazing national parks that cluster around that part of the country. Only about a two hour drive between the scene above and the scene below.

Sunday, March 09, 2008

GPS tagging

luxor

50mm, 1/40sec @f1.4, ISO 1600
I have looked in to some options of combining GPS data with the photos I take. For a few hours I thought about writing my own software, I also found the open source Happy Camel project and considered using that. Eventually I realised that the download software that I already use, Downloader Pro, has a GPS option in the latest version. I tried it out briefly prior to traveling to Death Valley but didn't really spend much time working out how to use it. Turned out that it was exceptionally easy to use. I'm really impressed. There's a 30 day evaluation available if you were interested in trying it out. The GPS isn't connected to the camera at all. There's no wires or wireless connection. I don't have anything new mounted on the camera hot shoe, unlike some other GPS tagging solutions. All I have to do is switch on the GPS unit and put it in my bag. It is creating a tracklog of where I go and when. The time on the GPS and the time on the camera need to be synchronised, or you at least need to be aware how different the time is (you can enter the difference in the downloader software). Once you've got that worked out, the GPS knows where you are at a given time and the camera knows when you take a picture (it is recorded in the photo's EXIF data). That's all you need to know to pretty accurately tag where the picture was taken. All that is left is to combine the two and fill out the GPS data field in the photo's EXIF data. That's where Downloader Pro comes in. I have a Garmin GPSmap 60CSx GPS unit. It has a 10,000 point automatic track log, so when I switch it on, it starts tracking. I'm sure this sort of track log can be generated by any GPS unit that can connect to a computer. (GPSBabel might be useful to convert to a format that Downloader Pro can understand). When I get back to my computer, I plug the camera's compact flash card into a card reader and hook up the GPS unit via USB. I switch the Garmin into the USB mass storage mode so that it appears as a hard drive on the computer. In that mode the latest track logs are available in the root of the drive. Downloader Pro is configured to scan removable drives for track logs. (Under GPS Settings, enable Geo-Tagging, set the camera and GPS clock times and for Track Log Settings select 'Search removable drives'). Once Downloader Pro is configured, I simply plug in the GPS, plug in the CF card, set a job reference name and hit download. Everything else happens automatically. I don't have to convert track formats, it already understands the Garmin GPX log format. Simple. You can also produce Google Earth and Google Maps viewable versions of the track log. Next thing I want to try is integrating the images into Google earth to have the shots hanging in space. For now though, when I load up the images in Lightroom there is a new field filled out in the EXIF - the GPS co-ordinates where the image was taken. The 'location' set of metadata browsing in Lightroom shows all this in a concise form. You can then click on the arrow to the right of the GPS data and a web page is opened to Google maps, showing the satellite view of where the image was taken. I also found out that in Flickr, you can change your account permissions, so that it will automatically extract the location information when you upload images. This then places them on the map and indicates where the image was taken automatically. The option is off by default and is under You->Your Account->Privacy & Permissions in the Import EXIF location data option. You can set different permissions on each image for who can see the location data and who can see the image. So you could let anyone see the pictures but only friends and family know exactly where it was taken, for example.
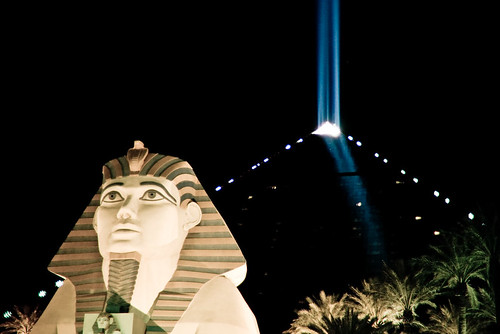
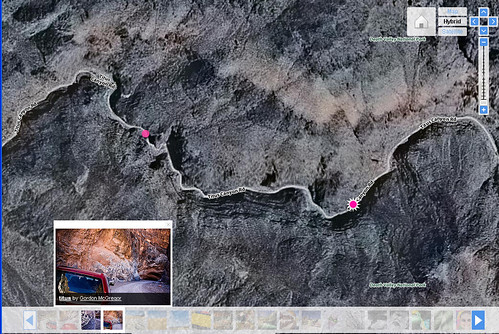
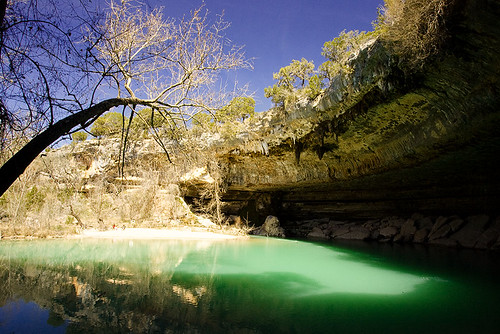
If you click on the shot of Hamilton pool, above, you can use the show on map option in the lower right to see where it was taken. 
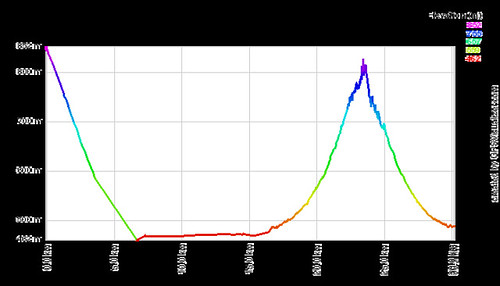
I am interested in any good examples of using geo-tagging in photos. It seems like a neat technology and fun to be able to see exactly where you were when you took a shot. I did use it quite a bit while scouting locations too, to mark a spot that I wanted to return to at a better time of day. Really then all I could have done was hit the mark button on the GPS and put a suitable name in. So far I've found this useful for sharing the location with others, more than anything else. When talking through the images, I could click on the GPS link and pull up the satellite view - handy to show just how far away from anything I was. In some other shots, it has been useful to be able to describe the route and thought process taken to finding a particular location. I have considered using it when out shooting in an urban area, to tag locations with great backgrounds for portraits - there are plenty around Austin and I occasionally forget where they are. Again there the information would be more useful for sharing those spots with others that might want to visit. I can already see my shots appearing automagically in Google Earth, when I switch on the flickr layers, which is quite neat. I'd actually like to work out if it is possible to include my images as floating billboards in Google Earth, when you fly past the location where they were shot. That might require directional information though, to really line up the scene. Useful Links

Saturday, March 08, 2008

birthday

birthday

Kate & Tim got me a fantastic birthday present, yesterday. A signed copy of From Uncertain to Blue by Keith Carter. Some beautiful photos from around and about in Texas.

Thursday, March 06, 2008

rhyolite

rhyolite

Just got back from Death Valley, real early this morning. Haven't had much time to look at the pictures yet but did get this one finished. I went to Rhyolite, which is an old ghost town, just to the North of the park. There is a rather strange set of art installations that made for some interesting pictures. Great trip. I drove about 900 miles since Saturday and took over 1600 pictures. I'm hoping a couple of them work out.