Wednesday, March 12, 2008

Austin Strobist GTG

Video from the latest Strobist GTG in Austin. We've got a good group, going places!

Tuesday, March 11, 2008

titus canyon

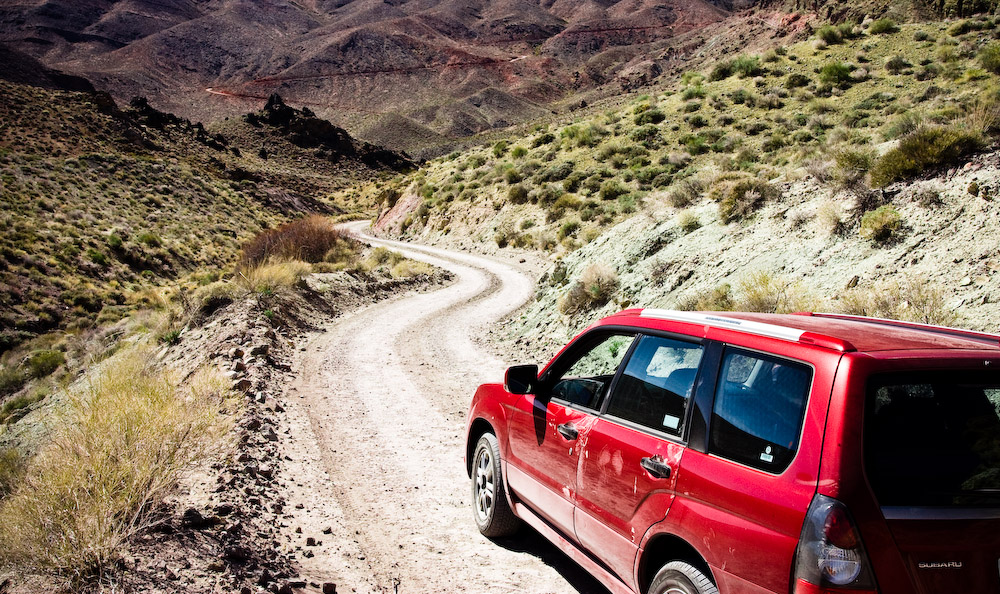
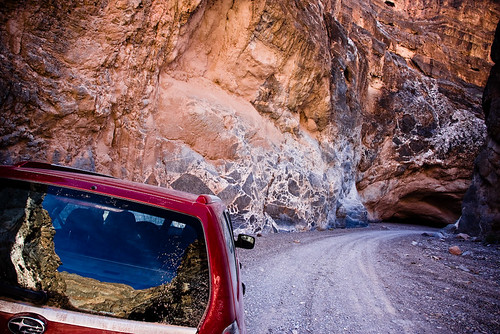
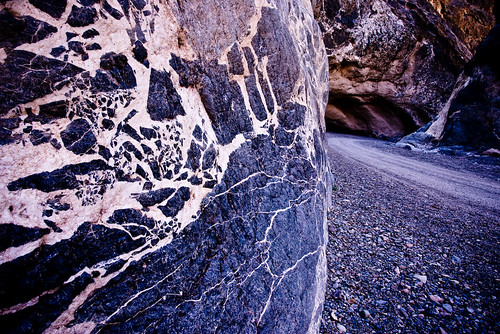
One of the fun things about visiting a National Park on my own was being able to set my own schedule. I could go where I wanted, when I wanted. Rather than on a workshop, where locations are dictated by the group or instructor, or with friends where photography is a reasonable last place. On this trip I could take my time, stop when I was interested in the landscape, take some pictures, scout out potential new areas for future shoots. There was time to just slow down and enjoy where I was. Workshops are a hugely creative, energetic experience but there isn't a whole lot of time to think or explore. The mid-day hours are given over the classroom work or critique and the rest of the time is a rush between shoots, sleep and food. On this trip to Death Valley I had a chance to go to some places I hadn't been before, including doing the 26 mile drive down through Titus Canyon. I left the park and made a trip to Rhyolite to shoot around there and had lunch, then set off down the 4WD only access road to the canyon. The sun beat down from a mostly cloudless sky but it was a still a pleasant 80F in the shade. The road wasn't particularly rough going and the scenery was breathtaking. I was amazed how much it changed over the drive, as I twisted and turned towards the small ghost town of Leadfield. Along the way I saw a red tailed hawk of some kind catching and circling above me with a snake in its talons. It soared on the strong breeze and just hung in the air over head for several minutes. I'd had enough of ghost towns with Rhyolite, so didn't stop in Leadfield. There were a few tin shacks and I'm sure some interesting things to explore, but I pressed on. After Leadfield the landscape changed quite quickly as the road dropped down into the real canyon. The walls got steeper and steeper and closer and closer. The early afternoon sun started to dip behind the canyon walls, giving some relief from the constant sun. The bouncing light between the canyon walls softened and picked up the orange glow of the rocks. Still the road wasn't particularly bad - certainly required high clearance in some places but nothing particularly testing, as it was dry. I found some petroglyphs by the roadside and stopped for a look. Unfortunately they are well marked and as a result have been added to by plenty of visitors.
Nearing the end of the canyon it got particularly narrow, finally birthing out onto an alluvial fan on the side of Death Valley. There's a small car park at the start of the two-way access road. I parked and walked back into the canyon a bit. The narrow canyon walls loomed over me and I was listening for cars all the time - there wasn't much room to get out of their way!
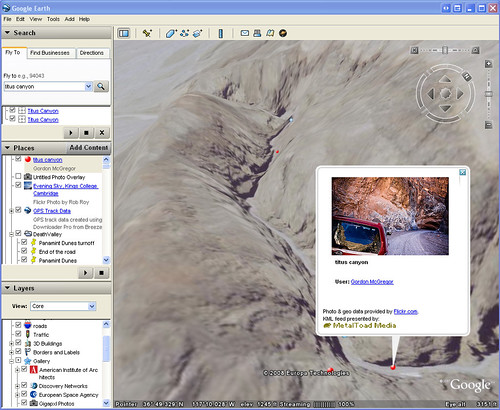
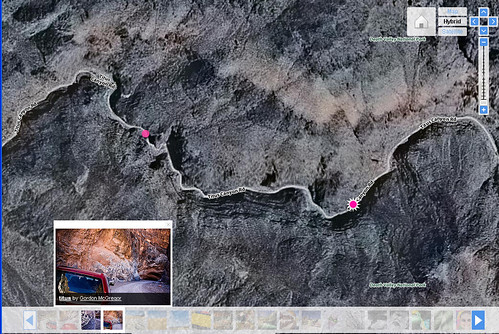
Titus Canyon was a really enjoyable drive, easy on the car and easier on the eye. Dramatic mountains, steep cliffs, red earth and black rock really add to the whole experience. I saw a few other people in there but mostly I was on my own and had a great time, traveling at my own pace. As I uploaded the images to Flickr, decked out with the appropriate GPS co-ordinates, I took a couple of screen captures of how the images appear in Google Earth and also on the Flickr mapping tool. Still exploring what is possible with the geotagged images. Being able to find them in Google Earth is interesting, seeing what other people have shot in the same area is particularly useful.

stove pipe wells

stove pipe wells

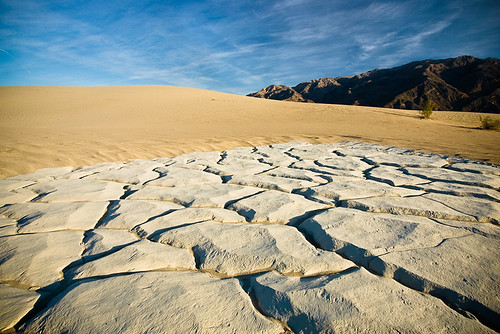
This was taken towards the end of the first full day in Death Valley. It had been extremely windy the night before and was still pretty breezy that morning. That might not sound ideal but it sure cleans up all the footprints on the dunes. These are quite close to a road and get a lot of foot traffic, so it is quite rare to get to photograph them without foot prints criss-crossing all over them. I like this particular shot because of how the cloud formations and shadows in the mountain are echoing some of the cracks in the mud. The shape and slope of the dune is also reflected in some of the deep cracks in the mud and the low angled late evening light warms and defines the deep splits in the dried mud. On this trip I realised that the dunes run diagonally along side the road - previously I've parked at the closest point and slogged up and down over smaller dunes to get into the middle of the field. Doing some scouting ahead of this trip on Goggle Earth I was able to see that if I stopped down the road, actually further away from the dunes, I could walk in along the ridges of the dunes. That made for a much easier time! I had to walk maybe a mile but it was over flat, hard packed mud, rather than hiking over the dune fields. It also let me find these great mud deposits that were a lot more expansive and thicker than I'd seen before. This time I approached from the upwind side, so sand hadn't really covered the mud and also I think this side is where the prevailing mud flows come from, so there was a much larger expanse pushing up against and no doubt being stopped by the dune field. The Google Earth scouting via satellite and road maps was really useful on this trip. I was able to mark specific way points then upload them to my GPS. Certainly helped me find my way around on the various small dirt roads and tracks that I got to investigate on this trip.

Monday, March 10, 2008

contrast

wildflowers

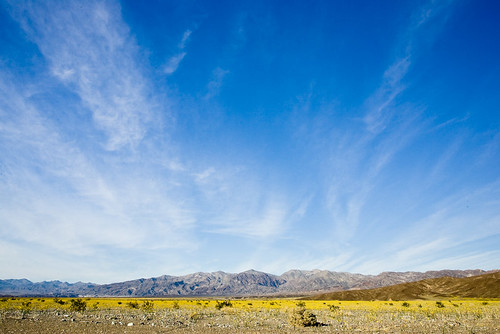
I was amazed this time around when I got to Death Valley national park. In the past it has been a beautiful, desolate landscape. Nothing but mud and rocks with the occasional creosote bush to break up the scene. The sun bakes down from a typically cloudless sky and the temperatures can soar to 130F and beyond. This time there was a carpet of 2 foot-high, yellow flowers across the whole of the area around Furnace Creek. They stretched all across the flood plains and up through the small valleys in the foothills. I noticed a particular increase in the density of the flowers around the roads. I'm told that cars driving along increase the local humidity around the road due to the exhaust moisture from the engine. grand
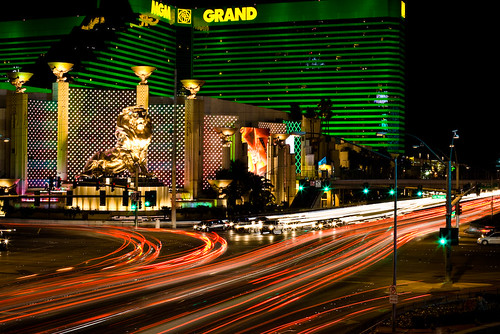
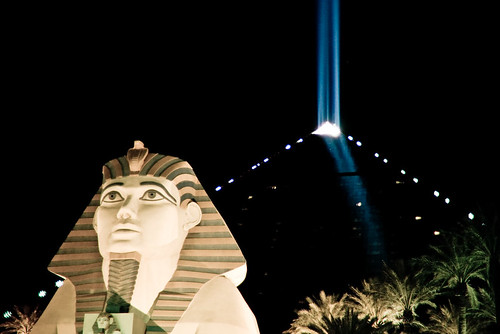
The wide open skies and flat desert was quite a contrast to the scene the night before in Las Vegas. I met my friend, Marti, at the Vegas airport and then we went for a walk around the Strip to find some dinner and do some shooting. I didn't take a tripod but managed to find enough ledges and walls to perch my camera on to get a few long exposure shots that I'm happy with. These days, the best thing about Las Vegas is using it as a jumping off point to all the amazing national parks that cluster around that part of the country. Only about a two hour drive between the scene above and the scene below.

Sunday, March 09, 2008

GPS tagging

luxor

50mm, 1/40sec @f1.4, ISO 1600
I have looked in to some options of combining GPS data with the photos I take. For a few hours I thought about writing my own software, I also found the open source Happy Camel project and considered using that. Eventually I realised that the download software that I already use, Downloader Pro, has a GPS option in the latest version. I tried it out briefly prior to traveling to Death Valley but didn't really spend much time working out how to use it. Turned out that it was exceptionally easy to use. I'm really impressed. There's a 30 day evaluation available if you were interested in trying it out. The GPS isn't connected to the camera at all. There's no wires or wireless connection. I don't have anything new mounted on the camera hot shoe, unlike some other GPS tagging solutions. All I have to do is switch on the GPS unit and put it in my bag. It is creating a tracklog of where I go and when. The time on the GPS and the time on the camera need to be synchronised, or you at least need to be aware how different the time is (you can enter the difference in the downloader software). Once you've got that worked out, the GPS knows where you are at a given time and the camera knows when you take a picture (it is recorded in the photo's EXIF data). That's all you need to know to pretty accurately tag where the picture was taken. All that is left is to combine the two and fill out the GPS data field in the photo's EXIF data. That's where Downloader Pro comes in. I have a Garmin GPSmap 60CSx GPS unit. It has a 10,000 point automatic track log, so when I switch it on, it starts tracking. I'm sure this sort of track log can be generated by any GPS unit that can connect to a computer. (GPSBabel might be useful to convert to a format that Downloader Pro can understand). When I get back to my computer, I plug the camera's compact flash card into a card reader and hook up the GPS unit via USB. I switch the Garmin into the USB mass storage mode so that it appears as a hard drive on the computer. In that mode the latest track logs are available in the root of the drive. Downloader Pro is configured to scan removable drives for track logs. (Under GPS Settings, enable Geo-Tagging, set the camera and GPS clock times and for Track Log Settings select 'Search removable drives'). Once Downloader Pro is configured, I simply plug in the GPS, plug in the CF card, set a job reference name and hit download. Everything else happens automatically. I don't have to convert track formats, it already understands the Garmin GPX log format. Simple. You can also produce Google Earth and Google Maps viewable versions of the track log. Next thing I want to try is integrating the images into Google earth to have the shots hanging in space. For now though, when I load up the images in Lightroom there is a new field filled out in the EXIF - the GPS co-ordinates where the image was taken. The 'location' set of metadata browsing in Lightroom shows all this in a concise form. You can then click on the arrow to the right of the GPS data and a web page is opened to Google maps, showing the satellite view of where the image was taken. I also found out that in Flickr, you can change your account permissions, so that it will automatically extract the location information when you upload images. This then places them on the map and indicates where the image was taken automatically. The option is off by default and is under You->Your Account->Privacy & Permissions in the Import EXIF location data option. You can set different permissions on each image for who can see the location data and who can see the image. So you could let anyone see the pictures but only friends and family know exactly where it was taken, for example.
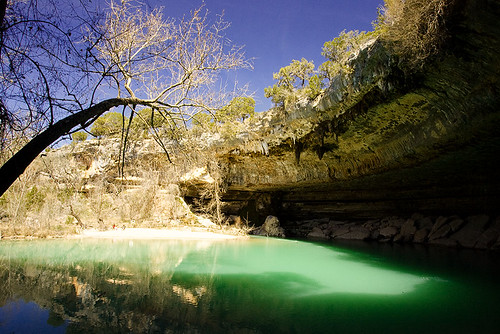
If you click on the shot of Hamilton pool, above, you can use the show on map option in the lower right to see where it was taken. I am interested in any good examples of using geo-tagging in photos. It seems like a neat technology and fun to be able to see exactly where you were when you took a shot. I did use it quite a bit while scouting locations too, to mark a spot that I wanted to return to at a better time of day. Really then all I could have done was hit the mark button on the GPS and put a suitable name in. So far I've found this useful for sharing the location with others, more than anything else. When talking through the images, I could click on the GPS link and pull up the satellite view - handy to show just how far away from anything I was. In some other shots, it has been useful to be able to describe the route and thought process taken to finding a particular location. I have considered using it when out shooting in an urban area, to tag locations with great backgrounds for portraits - there are plenty around Austin and I occasionally forget where they are. Again there the information would be more useful for sharing those spots with others that might want to visit. I can already see my shots appearing automagically in Google Earth, when I switch on the flickr layers, which is quite neat. I'd actually like to work out if it is possible to include my images as floating billboards in Google Earth, when you fly past the location where they were shot. That might require directional information though, to really line up the scene. Useful Links

Saturday, March 08, 2008

birthday

birthday

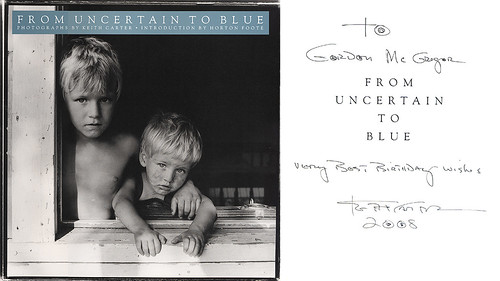
Kate & Tim got me a fantastic birthday present, yesterday. A signed copy of From Uncertain to Blue by Keith Carter. Some beautiful photos from around and about in Texas.

Thursday, March 06, 2008

rhyolite

rhyolite

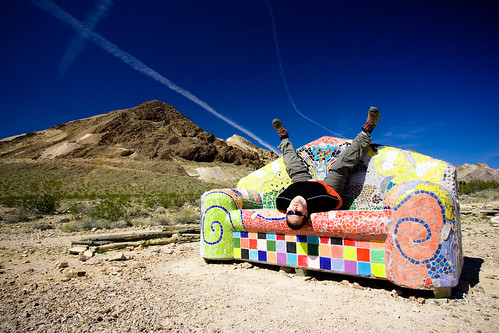
Just got back from Death Valley, real early this morning. Haven't had much time to look at the pictures yet but did get this one finished. I went to Rhyolite, which is an old ghost town, just to the North of the park. There is a rather strange set of art installations that made for some interesting pictures. Great trip. I drove about 900 miles since Saturday and took over 1600 pictures. I'm hoping a couple of them work out.

Friday, February 29, 2008

Death Valley, after the storm

Death Valley, after the storm

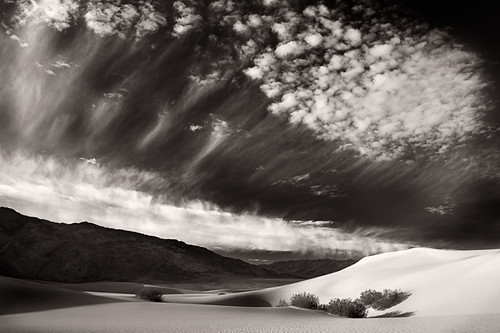
I'm heading off for a few days to Death Valley National Park. It's my birthday and I'm taking a few days to do some shooting and maybe try to write a bit more. This shot here is one of my favourites from the first time I went to the park. I'd been shooting all week and this was the final day. We were stretched thin by lack of sleep and there had been a blowing sandstorm a few hours before. I'd hiked out with the group through the sand and got some beautiful shots of the sunrise. I was tired and finished. Walking back to the car with the instructor, Craig Tanner, we were just chatting about things, then suddenly we noticed this scene unfolding in front of us. I was tired, ready for breakfast and almost didn't bother taking a picture. The sun was up. The shadows were getting pretty harsh, it just didn't look like a good photo to me, but Craig was excited. So I took a couple of frames. For me, this was probably the biggest lesson of the trip. I still haven't quite worked out what that lesson was, though, three years later. So I'm going back for another crack at it. See what I can learn on my own this time, listening to my own thoughts. I think since then, I've come to learn what a huge part clouds play in Craig's process - so maybe that was part of his excitement. I was on my first ever landscape workshop and hadn't really taken that concept in, until I got home and looked at the images I shot this particular morning. I was also still pretty green at making black and white images - still am really. This shot took a bit of coaxing to really appear from the original. Mostly though, this shot takes me back to the conversations I had that morning and the feelings I had enjoyed surviving the blowing sand and making great pictures. Nobody else gets to feel about this shot, the way that I do and that's okay. Maybe that's the lesson - the images have to stand on their own, as they don't tell others how you felt when you took it. Unless you really manage to put your heart and soul into them.

Monday, February 25, 2008

green

green

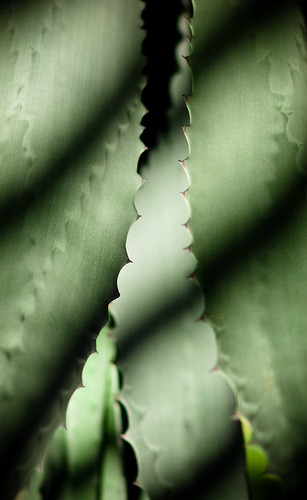
For this week's Austin Flickr meet-up I suggested we do something of a themed shoot. Got a load of bits of paper with colours written on them and then anyone that was game picked a colour at random. That's your new favourite colour for the next few hours - go shoot it! We decided that the 6 primary (for additive and subtractive) colours were a good starting point - red, green, blue, cyan, magenta and yellow. I picked green. First reaction (it always seems to be this reaction) oh, no, not green. Any other colour. Not green. I don't know why my brain always seems to rebel at these externally imposed, random constraints. It is never what I want. I looked out side, tons of vibrant reds, blues, cyans, magentas and yellows assaulted my eyes. No green, just bushes and grass. Boring. I want another colour. But I'd suggested this stupid assignment in the first place, I can't be the first person to quit! So I buckle down and start trying to shoot green. Then, as often happens, my eyes make that switch. I tune into the green theme. Green's are everywhere, all these green options to shoot. Why would anyone want to shoot any other colour, ever ? I'm still suffering the aftershocks this morning, seeing interesting green things to shoot all around. Maybe I'll always have that initial dislike of the random constraint. But it makes me think that element of randomness is important, otherwise I'll tend to pick something I'm comfortable with if I don't know what to shoot. I'm back reading the Lonely Planet Guide to Experimental Travel - I think there's some great ideas in there that could be adapted to random photography games. Odd book. Interesing book.
prêt-à-porter agave

Sunday, February 24, 2008

tom spreads his wings

tom spreads his wings

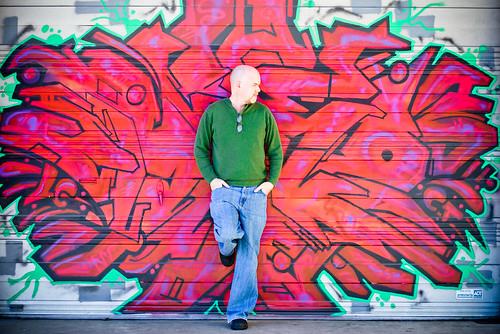
On the way to the weekly flickr get together I spied some garage doors that looked interesting, about a block from where we were meeting. Afterwards I mentioned wanting to take a couple of shots there and a few people walked on down. Tom was kind enough to act as the guinea pig and stepped up. There's 5 doors all painted with similar but differently coloured graffiti. I think I might be back again. I'm more tuned into the idea of finding backgrounds and as a result, I'm seeing great opportunities that just need a person in the right colours to set it off. I think this works quite well.